
Concrete Preparation for Epoxy Flooring
A coating can only do as well as the concrete holding it up. Whether epoxy or polyaspartic, the bond is largely decided before any product is mixed, by three things: how the surface was profiled, whether damage was fixed first and what the moisture readings said. Those factors mark the starting line for the coating.

The Short Answer
Three kinds of work go into readying a slab. Mechanical profiling roughs up the surface, handing the coating texture to grip rather than a slick face to cling to. Crack, chip and void repairs deal with weak areas before any product goes down. Moisture testing gives your installer actual numbers to work from when picking products, not hunches. The amount each area requires rests on what turns up when someone examines the floor in person.
The Three Essential Steps
Groundwork the slab receives ahead of the first coat.
01
Cleaning & Grinding
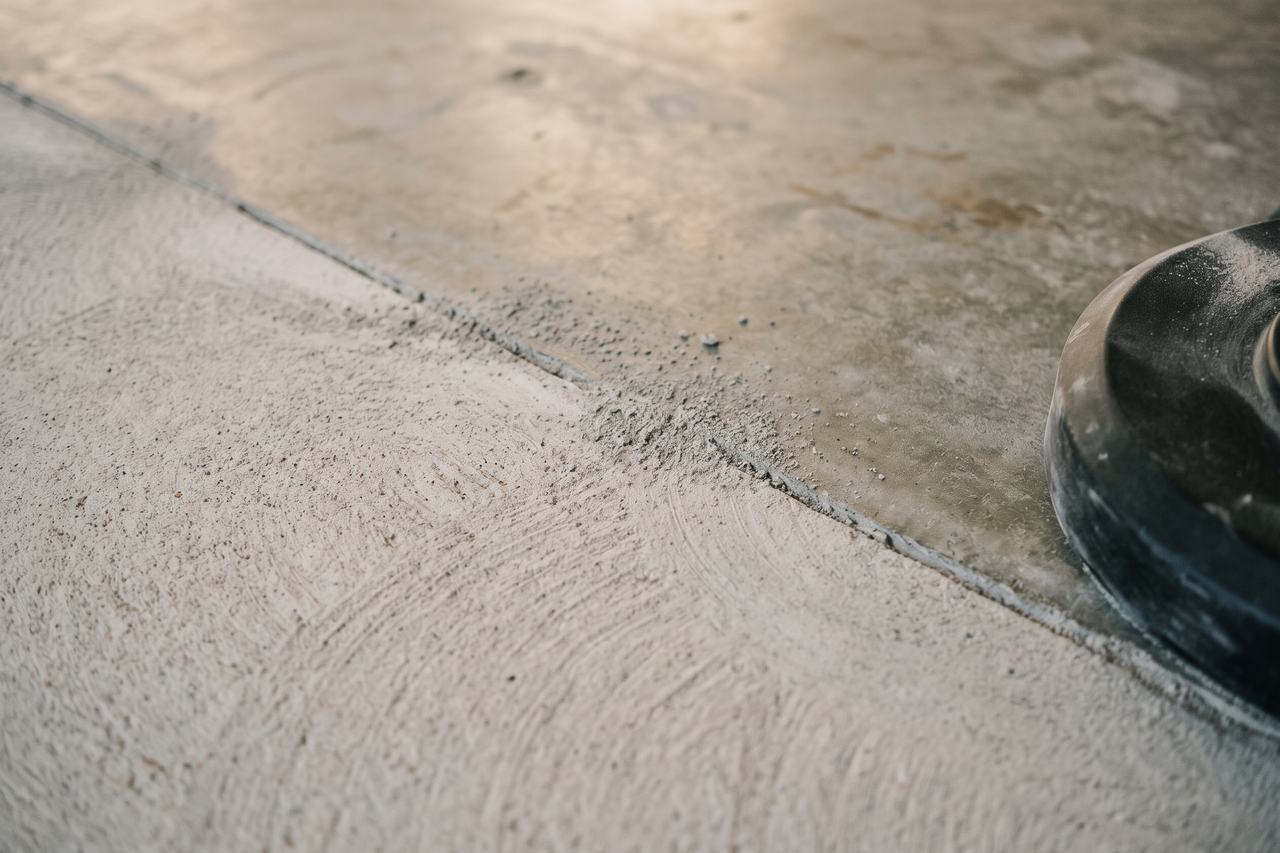
Everything starts with mechanically opening the concrete. During diamond grinding, abrasive tooling travels across the slab, cutting away the top skin to reveal a rough, porous surface for the coating to anchor into. Shot blasting gets a similar texture another way, by pelting the surface with steel media rather than cutting it. Which method fits comes down to the slab’s state and the product’s demands, and your installer makes that choice. Acid etching was once widespread, yet grinding and blasting have largely pushed it aside where modern epoxy and polyaspartic are concerned.
02
Crack & Surface Repairs
Lay coating across an open crack or a void, and the material clings to the concrete along each lip while hanging over empty space in the middle. That suspended stretch is vulnerable: foot traffic, wheels and temperature changes keep worrying at it, and the flaw may eventually print through the surface. Repairing cracks, chips and voids before coating takes those vulnerable spots off the table. Our epoxy floor repair page outlines how various defects are treated.
03
Moisture Testing & Inspection
Concrete breathes. Moisture from the soil below migrates up through its pores, and as long as the surface is bare, that vapor simply escapes. Seal the surface with a coating and the vapor gets trapped at the junction between slab and coating, where pressure builds and can loosen adhesion, showing up as blisters, bubbles or spots pulling loose. A vapor test ahead of product choice hands your installer sound numbers, both for picking materials and for judging whether to add a moisture-control step.
How Does Grinding Improve Adhesion?
Epoxy and polyaspartic hang on through a mechanical grip, and that grip needs open, textured concrete. Skip the profiling on a sealed, polished or untouched slab and the floor may look clean and ready while the coating finds precious little to hold on to.
Two mechanical approaches are the professional norm. With diamond grinding, abrasive heads sweep over the concrete, taking off the surface layer so the coarse stone in the mix shows and the texture is left rough and open. With shot blasting, steel shot is hurled at the slab to create a comparable profile through sheer impact. Either way the coating gains a surface to key into; which tool suits a job depends on the concrete and on what the product calls for.
How deep the profile should be shifts with the coating type and the condition of the slab, and your installer chooses that target following an evaluation of the floor, before a grinder ever touches it.
Should Cracks Be Repaired First?
Why fix cracks before coating? Coating laid over an open crack holds to the two sides and nothing in between, so it ends up spanning a gap rather than resting on solid concrete. Everyday weight and shifting temperatures keep loading that unsupported spot, until the crack may reappear in the finish.
Which repair is right hinges on the reason the crack exists. Fine, motionless cracks get handled during normal preparation. Ones that keep shifting, slice deep into the slab or trace structural load or settlement belong in a separate category, and the force moving them must be understood ahead of choosing any repair material.
Our guide to repairing worn or damaged coatings explains how typical crack types are sized up and which fixes fit each one.
Why Is Moisture Testing Important?
Soil holds water, and the slab sitting on it feels the effect. Vapor rises through the concrete, meets a sealed coating and finds no exit. Pressure collects at that boundary and pushes upward on the bond, which can appear as bubbles, blisters or patches that lift away.
Moisture readings taken before product selection turn guesswork into a measured decision. Products differ in how much vapor they tolerate, so elevated numbers can justify laying a moisture-mitigating primer underneath, ahead of the primary coating, a choice grounded in data.
Skipping moisture data means betting on assumptions. When the bet goes wrong, moisture turns into a familiar factor in early coating failures, sitting alongside preparation, product choice and installation conditions.
Can Epoxy Go Over Painted or Previously Coated Concrete?
Before coating over an earlier layer, three things need answers: what the existing material is, how securely it is bonded and whether the new product is compatible with it.
An old coating that is already failing, curling along its edges, bubbling or flaking under a fingernail, cannot serve as a trustworthy base. Anything applied on it simply inherits the adhesion problem.
A tightly bonded, compatible layer may be fine to coat over. Figuring out precisely what sits on the concrete is one task the preparation assessment takes on.
How Should You Prepare Your Garage Before the Contractor Arrives?
The flooring professional takes care of profiling, repairs and moisture testing. Your part is mostly about access and information: empty the garage, then jot a few notes on floor details that might prove useful during the evaluation.
A short garage checklist:
- Clear out cars, bins, tools and anything else sitting on the slab so the full surface can be reached.
- Point out any moisture hints you have seen, such as puddles after a storm, a white chalky bloom or soft-feeling areas. Details like these sharpen the assessment.
- If the floor carries old paint or a previous coating, pass along whatever you know, partial information included.
- Ahead of the project, ask about the sequence of the work and how the space will return to everyday use.
For the full sequence, from slab work to a finished surface, read our epoxy floor installation walkthrough.
Frequently Asked Questions About Concrete Preparation
Just how much does preparation shape a coating's performance?
Significantly. Early coating failures frequently trace back here: preparation is often part of the problem, with moisture, the chosen product and on-site installation conditions also in the mix. Without careful profiling, cleaning and repair, a coating has little mechanical grip to rely on; careful preparation, on the other hand, gives a better foundation for long-term performance.
Do all concrete slabs get identical preparation work?
Far from it. Picture one slab with no prior coatings, light contamination and normal moisture readings, and another with all three problems; the two jobs look nothing alike. The prep plan your installer draws up follows what the individual floor shows, not a standard script.
What if my slab has many cracks?
The kind of cracking tells more than the number of cracks. Hairline cracks that have stayed stable are usually absorbed by routine preparation with little change in scope. Active-looking cracks, deep ones, or those tracing load or settlement lines each need their own assessment before anyone chooses a repair material.
Can acid etching stand in for grinding?
Grinding is the professional norm for modern epoxy and polyaspartic, while etching has a reputation for inconsistency. Its profile tends to come out uneven, and the residue it leaves has to be fully handled before coating. Your installer picks the method suited to both the slab and the product.
Before coating new concrete, how long does it need to cure?
A figure of roughly 28 days of curing is commonly cited before new concrete gets coated, but treat it as a general guideline instead of a hard rule. Whether a slab is truly ready depends on its mix, the temperatures it cured in and the coating product. Your installer verifies readiness before preparation begins.
My moisture test came back high. What now?
A high reading trims the list of suitable products; coating is not automatically ruled out. The readings guide your installer toward suitable products, and with unusually high vapor, a moisture-mitigating primer placed below the primary coat may be suggested, with the test data backing that step.
Ready to Get a Quote for Your Concrete Floor in Chillicothe, MO?
Your slab has a backstory and a current condition all its own. Describe what it looks like now to request a customized estimate.