
Epoxy Floor Installation: What to Expect
Think of an epoxy installation as a chain where every link depends on the one before. What the inspection finds sets the preparation plan, preparation determines the strength of the bond, and how curing is handled affects the floor’s performance once it goes into use.

The Short Answer
Five stages make up the job: the slab is inspected, ground and cleaned, visible damage is repaired, coating layers go down in order, and the floor cures. Before any work starts, your installer sees your concrete in person and describes how the plan applies to it.
What Happens During Professional Epoxy Floor Installation?
The five stages happen in a set sequence, with each stage laying groundwork for the next.
01
Evaluate the Concrete
Your installer begins by studying the slab firsthand. Moisture tests, checks for any sealer or coating left behind, and a close study of surface texture produce an accurate picture, and that picture drives both what coating gets recommended and how far preparation must go.
02
Prepare the Surface
Epoxy needs a mechanically opened surface with texture to grab onto. The dense top layer comes off through diamond grinding or shot blasting, producing that profile. The slab’s past, any coatings still on it and whatever has bonded to it determine how much work this stage involves.
03
Repair Cracks and Defects
With bare concrete showing, cracks, spalls and other damage get repaired. Fixing them before coating means every flaw stays visible and easy to reach, letting each be assessed and treated individually rather than guessed at later.
04
Apply the Coating System
Coats are applied in the manufacturer’s prescribed sequence: primer, base coat, optional decorative broadcast and topcoat. No layer goes on until the one beneath has reached the right set condition.
05
Allow the Floor to Cure
After the final coat, the floor earns its capabilities in steps. Walking comes first, vehicle traffic later, and full chemical resistance last. Your installer spells out every threshold before the project begins.
What Makes a Professional Installation Different?
Look-alike slabs can turn out to be nothing alike once someone examines them. One may hide elevated moisture, leftover coating film and active cracking; the slab next to it may be dry, clean and solid. Professional evaluation picks up on those contrasts rather than assuming one approach suits all concrete.
Early coating failures usually trace back to identifiable causes. Preparation is often part of the problem, alongside moisture, the coating chosen and conditions during installation. Handling every one of them lays a better foundation for long-term performance.
Ready to talk through your own slab? Share what you know about your floor and request a customized quote.
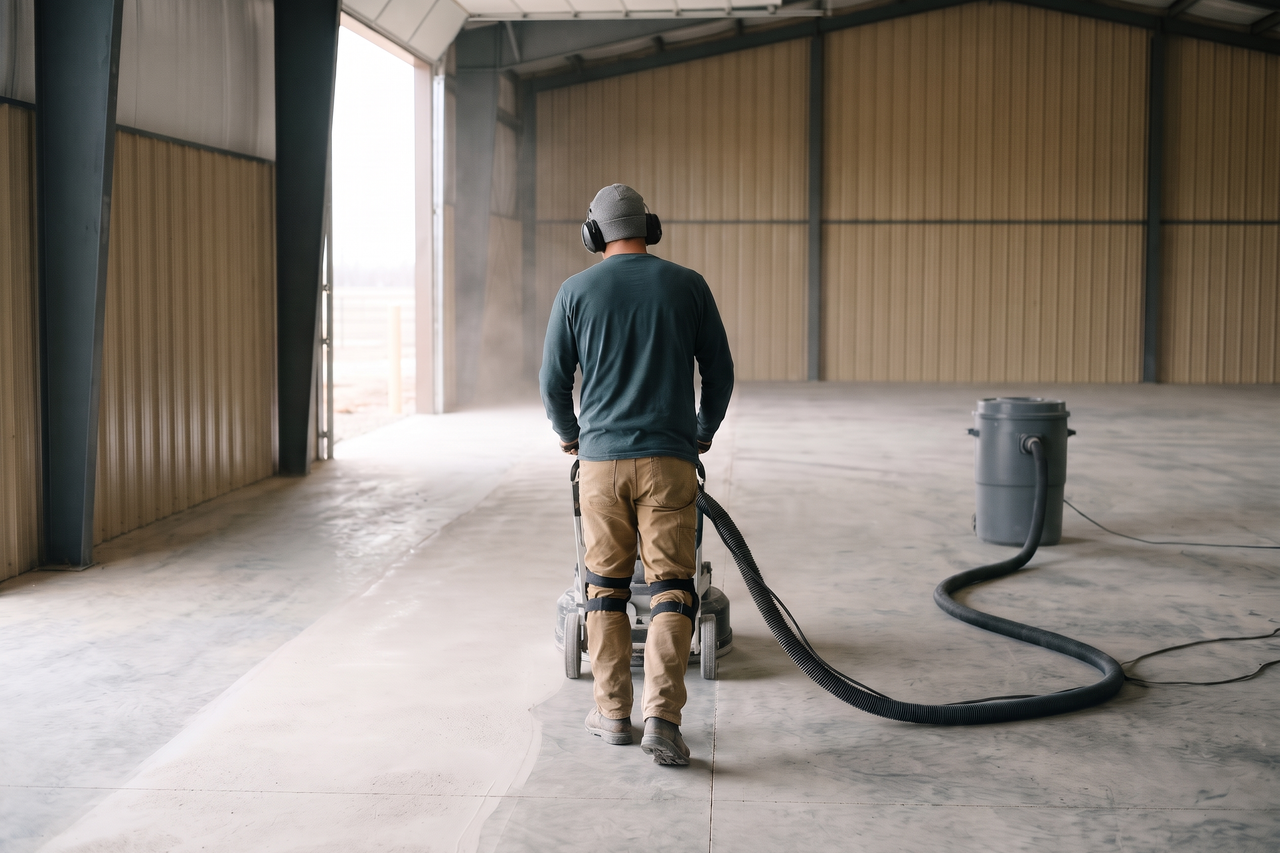
Why Concrete Preparation Matters
Want the fuller story on grinding methods, crack repair and moisture testing, and how each is handled on a real job? Our rundown on readying a slab for epoxy covers it.
Epoxy grips concrete mechanically. Grinding opens up the pores; the coating seeps into that roughness and keys itself in as it hardens. Sealed, painted or slick-polished concrete leaves the coating almost nothing to hold, so the bond on an unprepared slab starts off weak.
Preparation needs follow the floor’s history. Unsealed new concrete is a completely different starting point from a slab carrying layers of old paint, mastic or sealer applied again and again. Your installer sets the scope according to what the surface really shows, not a one-size rule.
Repairing Cracks and Surface Damage
Repair work happens with the slab fully bare. Stripping old coatings and profiling reveal the real extent of cracks and weak zones, so each gets handled before primer seals it off from view and access.
Cracks are evaluated one by one. Treatment for a shallow, stable hairline differs from the approach for one that is widening or has developed a lip where one side rose. Movement can call for flexible filler or a bigger repair, with your installer explaining the chosen fix for each defect before proceeding.
Coat over an untreated crack and the problem simply hides underneath. Edges of the finish can start lifting, and an active crack can work its way back up through the new surface. Put defects right while bare concrete is still exposed.
Applying the Epoxy Coating System
Curious how the two compare on durability, UV behavior and application? See epoxy and polyaspartic, head to head.
Once prep is done, the layers follow in order. First comes primer, soaking into the profiled concrete to give everything above it a stable footing. When the design includes decorative flake, chips are scattered onto the base coat while still tacky, letting them lock in as the material sets.
The topcoat is what meets the daily abuse: shoes, dropped tools, tires and cleaners. Choice of product, coat count and film thickness all get settled with the space in mind, and a commercial floor that carries heavy equipment and sees chemicals often needs a different build from a home garage that sees light use. Temperature and humidity get monitored the whole way through, because both influence how each coat builds and adheres.
How Long Does Epoxy Flooring Take to Cure?
Pricing questions on your mind? Our epoxy coating cost explainer breaks down the role of floor size, slab condition and the system selected.
Readiness after coating comes in steps, not all at once: first foot traffic, next vehicles, last full chemical resistance. Push heavier use onto the floor ahead of the right stage and you risk marks or damage that resist repair.
Full chemical resistance waits on the coating cross-linking through its entire film thickness. A surface can feel firm well before then, so hardness to the touch is not proof of readiness. Cure timing varies with the system and site conditions, and your installer walks you through it ahead of the work, with the floor’s dimensions, its condition, the prep required and the chosen system all part of the picture.
Frequently Asked Questions
Q: What can a slab inspection reveal ahead of the work?
The inspection shapes everything that follows. Moisture readings, a record of any existing sealers or coatings, a look at cracks and an evaluation of the surface profile together identify the right system and how much prep the slab will take. Lacking them, a recommendation is just a guess.
Q: What happens when surface preparation falls short?
Coatings depend on the texture grinding leaves behind. If the profile comes out shallow or slick, or old coating residue still clings to it, adhesion suffers before the first coat ever goes on. When a coating peels early, there is rarely a single culprit: preparation is often part of the problem, while moisture, product choice and installation conditions can contribute too.
Q: Can an old coating stay in place under a new one?
Sometimes, depending on what is there now. An old coating that is well attached, showing no lifting and able to accept the new product may be able to stay, provided an on-site evaluation supports it. Anything flaking or delaminating generally has to be removed first. Your installer studies the current surface and explains which routes are open.
Q: How will I know the floor is ready to walk on, drive on and expose to chemicals?
Your installer covers each milestone before work begins: when you can walk on the floor, when cars and trucks can come back and at what point full chemical resistance arrives. The way that progression unfolds depends on floor size, condition, the prep involved and the coating system.
Q: Is a crack in a finished coating a sign the coating failed?
Usually not. Cracks that surface through a finished coating generally trace to the concrete below moving, whether through settling, shifting or moisture-related swelling, not to a flaw in the coating product. Ask a flooring professional to inspect it; they can offer a read on the probable cause and a recommendation on whether repair is sensible.
Q: Does site temperature or humidity change the outcome?
Yes. Every manufacturer publishes temperature and humidity limits covering application and cure, and stepping outside those limits can weaken the bond or produce an uneven set. Site conditions get checked by your installer before starting and tracked throughout application.
Ready to Upgrade Your Concrete Floor?
Serving Chillicothe, MO and surrounding areas. Outline your concrete and the way people use the space, then request a customized quote.